In this guide, you’ll learn how to use the Tixati torrent client to download torrents anonymously.
This will be accomplished by using one of two tools, a VPN or Proxy.
We’re going to show you to hide your IP address while downloading torrents with TIXATI, which will make it very difficult for anyone to trace your downloads based on your torrent IP address.
You’ll also learn how to easily encrypt your torrent uploads/downloads which will prevent your Internet Provider (ISP) from knowing what you’re downloading or blocking/throttling your torrents.
WHAT WE MEAN BY ‘ANONYMOUS’ TORRENTS
There are two main ways your Tixati torrent activity can be tracked:
- Your IP address is easily visible to all peers sharing the same file (true for all peers)
- Your ISP can ‘sniff’ (read) your traffic and see what you’re downloading
This guide will show you how to hide your ‘real’ IP address and replace it with a ‘virtual’ IP, which will be the one that is visible to torrent peers.
You’ll also learn how to encrypt your torrents, which means even your Internet Provider can’t see the content of your torrent traffic, or log your download history.
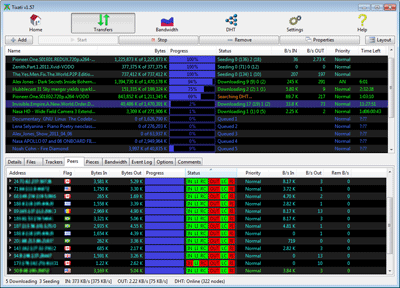
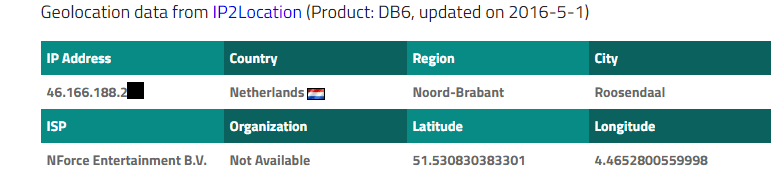
Here’s what you look like to Tixati Peers…
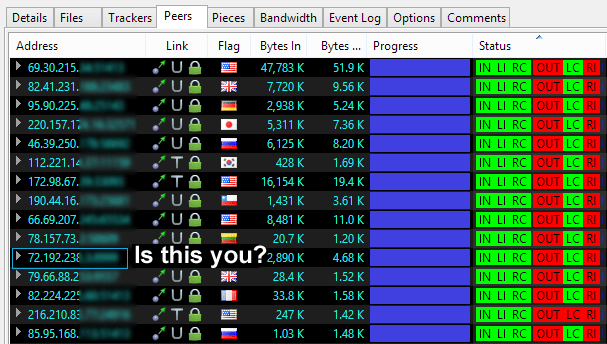
Tixati not only shows the IP address of each peer, you can even see the country that they’re from. Unfortunately, this is a necessary feature of p2p file-sharing technology (each peer needs to know how to connect to your computer to upload/download the torrent).
But we can fix this privacy leak by routing all torrent traffic through a 3rd-party server, so all peers will only see the IP of that server, not our own computer. We’ll do this with a VPN and/or Proxy service, but first, an important security note…
SPECIAL SECURITY CONSIDERATIONS FOR TIXATI
Tixati, like all other major torrent clients, has built-in proxy support (1 of 2 methods that can be used to hide your Tixati IP address).
But there’s a problem: Tixati only supports TCP connections through the proxy. Magnet links and DHT both use UDP protocols (instead of TCP).
The issue is, all non-supported connections will be routed OUTSIDE the proxy tunnel, which could lead to your true IP address being exposed.
There are 3 solutions to this problem:
- Disable DHT’ and UDP tracker connections in Tixati options (but this may prevent magnet links from working).
- Use a VPN (with or without proxy). If you use both, peers will see your VPN IP (still anonymous)
- Use another torrent client with better proxy support
Don’t worry too much though, if you love Tixati, just make sure you use the VPN option:
This way, you won’t be affected by proxy leaks. This guide will use a VPN service that includes proxy service also, so you have can always make the choice later.
If you’d rather switch to a different torrent client, we have setup guides for:
THE VPN/PROXY SERVICE WE’RE USING FOR THIS TUTORIAL
![]()
Based in the USA
No Logs Kept
Private Internet Access is a fantastic VPN/Proxy service for torrents, and they were named our #1 torrent VPN service for 2014, 2015 & 2016.
Why we you choose Private Internet Access
- Zero Logs. None. Period
- Extremely Torrent-friendly. Torrents allowed on all servers
- Includes zero-log SOCKS5 proxy service (at no extra charge)
- Works with every torrent client
- unlimited speed/bandwidth
- Low price: plans start at only $3.49/month
TUTORIAL SECTIONS
These are the steps/options we’ll cover in this tutorial. Feel free to skip ahead (for example, if you choose the VPN option, you can skip the proxy section unless you want to use both together).
- VPN Setup (Option #1. Easiest option and the one we recommend)
- Proxy Setup (Option #2. We recommend you use use the VPN also, to keep DHT and avoid IP leaks).
- Verify your ‘Virtual’ IP – Check to make sure your proxy/VPN is working and your Tixati IP has changed
TIXATI VPN SETUP (OPTION #1)
Using Tixati with a VPN is extremely easy. The VPN will change your IP address as well as add extremely strong 128-bit or 256-bit AES encryption (depending on your VPNs settings) which will make your internet traffic impossible to read by anyone that intercepts it (like your internet provider).
We recommend using Private Internet Access as your VPN provider, but you can also choose from these non-logging VPNs that allow torrening.
Using a VPN doesn’t require you to change any settings inside Tixati, the VPN software does everything.
Step #1: Download and install the VPN software
After you sign up for PIA, you will be emailed your login/password info as well as a link to download their VPN software (Windows, Mac, iOS, and Android).
Then simply download and install the software.
Step #2: Choose ideal VPN Settings
Let’s choose the ideal VPN settings for torrenting. We want 3 things:
- A Torrent-Friendly server location
- As much speed as possible (faster server location and lighter encryption)
- Turn on the kill-switch (prevents IP leaks if VPN disconnects)
Open PIA settings and go to ‘advanced’ settings
1. To open PIA’s settings, Right-Click on the PIA system tray icon, then scroll down the server list until you see the ‘settings’ option. Click it to open PIA’s settings menu.
2. Enter your Username/Password then click the ‘Advanced’ button
3. Make your settings match those shown. Here’s what they mean:
- Connection Type: UDP (UDP is faster than TCP connections and better for torrents)
- Port Forwarding: None (PF is unnecessary because all torrent traffic is routed through VPN direct to your computer)
- VPN Kill-Switch: Instantly kills all internet traffic if VPN drops. Prevents Tixati from leaking true IP address
- DNS Leak Protection: Makes sure your ISP can’t see what websites you visit
- IPv6 Leak Protection: Make sure Tixati can’t leak your IPv6 address to peers (as opposed to IPv4)
4. Encryption Settings: PIA lets you choose what encryption settings to use. Their default settings are probably optimal for torrents. They use 128-bit AES encryption (ideal blend of speed and security).
Step #3: Connect to a torrent-friendly VPN server
PIA allows torrents on all servers, but on some servers they will actually reroute your p2p traffic (not other traffic) through a second VPN server. This makes torrent users safer but also will slow your p2p traffic if you use one of the servers that gets rerouted.
Server locations we recommend:
- Switzerland
- Netherlands
- Canada
- Mexico
- Other safe countries
To connect to a server, just right-click the PIA tray icon and choose a server location from the list that pops up. Once you’re connected, the icon will turn green as shown:
Step #4 – Verify your New IP address, and then Open Tixati
We can quickly verify our virtual IP address by using a tool like iplocation.net
This will show you that your VPN connection is established properly. You can now open Tixati and proceed to the torrent-ip verification step (at the end of this tutorial) or just use this guide: How to check your torrent IP
TIXATI SOCKS5 PROXY SETUP (OPTION #2)
Just a reminder, if you’re using the Proxy option, you will either want use it in addition to the VPN (will change your IP twice) or disable DHT and UDP trackers (to prevent UDP IP leaks).
The first step will be to get our SOCKS5 proxy login credentials from PIA (different than your VPN login/password). You can sign up for Private Internet Access here (if you haven’t already).
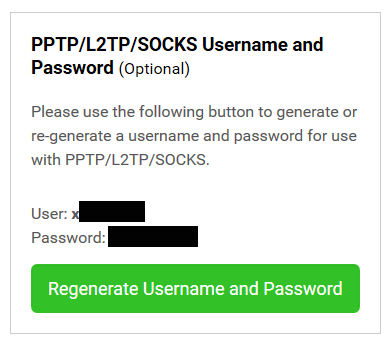
Step #1 – Generate a Login/Password for the SOCKS Proxy Server
Private Internet Access gives you full access to a non-logging, high-bandwidth proxy server based in the Netherlands. It doesn’t use the login/password as your VPN account does (for security reasons) so you have to generate separate credentials.
1. Log into your account panel (on their website)
2. Scroll down until you see the ‘PPTP/L2TP/SOCKS Username/Password’ section
3. Click ‘Regenerate Username and Password’
4. Keep the window open so you can copy & paste your SOCKS username/password
Step #2: Configure Tixati Proxy Settings
1. Open Tiaxi Settings and go to: Settings > Network > Proxy
2. Choose ‘SOCKS5’ as the proxy type
3. Check the box ‘Use Proxy to Resolve Names’
4. Enter the proxy address, and login details as follows:
Address: proxy-nl.privateinternetaccess.com
Port: 1080
Login: Your proxy username you generated in step #1
Password: Your proxy password from step #1
when finished, it’ll look like this (also, note the proxy security warning from Tixati)
Step #3: Additional Security Settings (if you’re using proxy only, without the VPN)
In this step we’re going to disable all connections that require UDP transport (not supported by Tixati’s proxy) as well as disable IPv6 (another way your IP could leak). You can also optionally add encryption to prevent throttling/monitoring by your internet provider (but forcing encryption will reduce # of available peers).
1. Go to Settings > Network > Connections
2. Force peers to use TCP only (change settings as shown below)
3. Block IPv6 to prevent IPv6 leaks of your true IP
4. Add encryption if desired. There are two options:
- A) Use encryption when available (doesn’t reduce peers, but not all connections will be encrypted)
- B) Force Encryption (reduces peers but uses 100% encryption)
Just use the settings show below based on your preferred encryption mode…


5. Disable UDP Trackers (go to Settings > Transfers > Trackers)
6. De-select ‘Allow UDP Tracker Connections’
Congrats, your Proxy settings are fully configured. Now just make sure to test your torrent IP address (to make sure the proxy is working correctly to hide your IP address).
HOW TO VERIFY YOUR NEW TORRENT IP ADDRESS
We want to make sure your peers see your new ‘Virtual’ IP address which is assigned by your VPN/Proxy you’re using, and not your ‘real’ IP address.
To do this, follow these steps:
1. Go to checkmytorrentip.upcoil.com
2. Click the ‘Add this Magnet Link’ button and open it in Tixati
3. The webpage should then update to show the IP address it is detecting from Tixati (shown below)
You can easily verify that your torrent IP address is different than your web browser IP address (we were using the SOCKS proxy option for this test). If you’re using a VPN, your browser IP and torrent IP will be identical, but should be different than your real IP (when the VPN is off).
4. You can also check your torrent IP from inside Tixati. Click on the tracking torrent, then go to the ‘Trackers’ tab:
5. You’ll see an error message like: ‘Tracker failed with reason: IP is xxx.yyy.zzz.aa’
Congrats, you’re all set up and your torrents should be highly anonymous. For more ways to verify your torrent IP address, check out our guide.
USING TIXATI’s IP-FILTER & BLOCKLIST
Tixati has IP-filtering built into the client which can be combined with blocklists like Peerblock and Peerguardian.
Should you use IP-filtering?
In theory, IP-filtering allows you prevent malicious peer connections. In reality, a blocklist does almost nothing to improve your safety, while dramatically reducing speeds and peer availability.
So no, we don’t recommend it. And if you use a VPN, there’s no point.
How to use IP-filtering
If you still want to use Tixati’s IP-filter, first you’ll need a blocklist.
Then, go to Settings > IP-Filter and turn it ‘On’
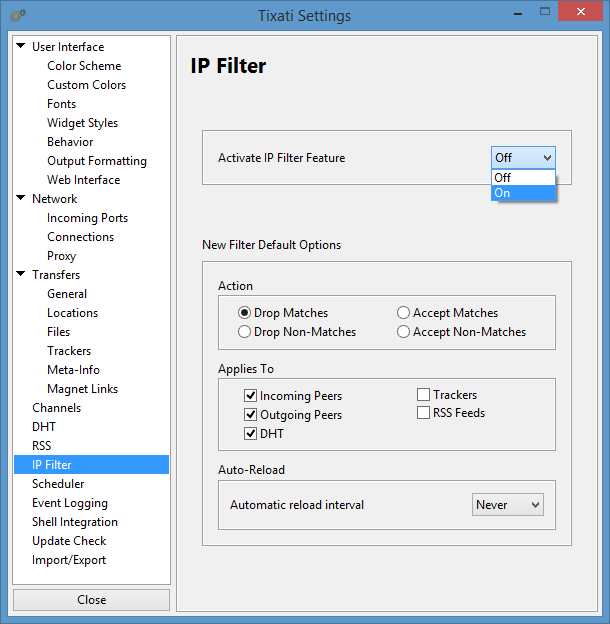
Then need to go to the IP-filter tool itself by clicking on the icon at the top-right corner of the Tixati interface. It looks like a castle wall:
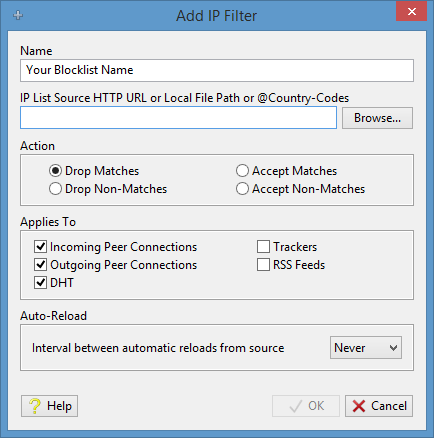
Finally, you can add a new IP Filter by creating a name and importing a blocklist you downloaded (or filtering by country codes).
For more even info, read this guide.
SUMMARY & ADDITIONAL RESOURCES
If you followed all the steps in this guide, your Tixati torrents should be highly anonymous.
One Caution: The TCP-only for proxy issue with Tixati is annoying so it’s definitely worth considering another torrent client if you like the proxy option.
If you’ve got any questions or just want to say thanks, make sure to leave a comment below!
Can you update this for Tixati v2.74+ They added proxy UDP support and have proxy more settings.
Thanks for letting us know. I’ll add it to the article queue.